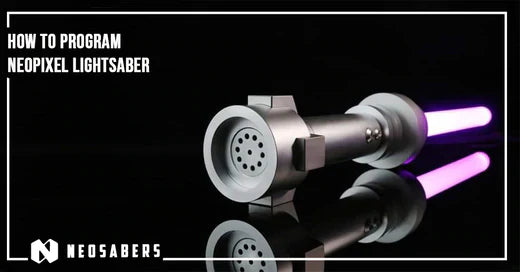
Hello guys. Are you also thinking, “Can a lightsaber change color?” Well, yes and here's your perfect guide to add colors to your Xenopixel board. The following article will help you to easily add/edit colors to your Xenopixel board. Let’s get started!
Step 1: Removing the Battery
To begin with, remove the battery, you should never remove the SD Card without removing the battery.
So, please make sure to remove the battery first. You can either tap it out or you will notice a gap between the speaker and the place where the SD card sits. You can just push the battery from there by using a non-marring product. Do not use anything metal. We recommend using a plastic nylon pry tool or something.
Step 2: Removing the SD Card
Once the battery is removed, you can pull the SD card out very gently. Tweezers will work well here. Just be very careful. Do not push the SD card holder upwards as you may end up damaging the card holder and the card. Once the card is removed, use the included micro-SD card reader in order to plug it into your computer. Navigate to your USB device on your PC screen and open up the file manager.

SD Card Reader and SD Card
The SD card will have several folders. The numerical folder here. It is starting from number 1 to number 21. All of the different sound fonts. So, here you have 21 sound files by default. At the bottom is the set folder. The set folder contains configure files, sound files and it is also where you can upgrade the firmware.

Occasionally, there will be a firmware upgrade file there, config.in. and there in, you can change the lightsaber color and things like that for sound fonts.

Coming to the actual task.
How to add colors to Neopixel Lightsaber
Remember! You just have to make sure that when you are creating a new folder, in this case, they are all numerical so the next folder will be 22. When you put your files into that folder, make sure that they follow the same naming structure as what you saw in that other font folder. You need to make sure that your clash, blaster, swing, whatever it happens to be, all of those files have to match that naming structure.
Go to the configure file, open it with a text editor. So, once you open up the text file you can see all the things you can edit here. You can see here you have got (r, g, b) which corresponds to red, green, blue next to the font folder.

As shown: Color-1= (25,13,17),1,1
Color-1 is for all the files in folder 1.
And (21,273,47) corresponds to RGB value. And 1,1 corresponds to blade effects. Right here you can go online i.e., on google just do RGB color picker and you can change the color to whatever color you want you get the RGB value right here.
For instance: if you want your lightsaber to be neon green you can simply edit the text in the parenthesis like: Color-1= (21,237,47),0,0 means Standard green color blade with no flashing.

If you want your lightsaber to be blue you can simply edit the text in the parenthesis like: Color-2= (0,0,255),1,1 means Steady white color blade with no flashing. Likewise, you can add different colors of your choice by simply altering the figures in the parenthesis.
If you want to make a new sound font e.g., 22 in this case.
If you want a white blade, just make changes like: Color-22= (255,255,255) which is the highest value.
Read More: How to Program Neopixel Lightsaber?
If you want a red blade, just make changes like: Color-22= (255,0,0) which is the highest value. Here green and blue are zero but you can combine those colors in any variation that you want.
Note:
Example using RGB formula (0-255) is as follows:
White= (255,255,255)
Green= (0,255,0)
So, if 1 is red blade config shows: Color-1= (255,0,0)
If making custom colors font 2 would be: Color-2= (10,74,240)
Etc.…..
- Zero (0) means less brightness
- 255 being maximum

Finally, save the changes that you have made. Eject the USB from your computer. So now you have added a new custom color to your SD card, take it out from the SD card reader and put it back to your saber. Make sure that the battery is still taken out of your saber. Do not put the battery back in before putting the SD card in and very gently put your SD card into position right back where it was before on the board. Lastly, put your battery back. And Voila, now you have a lightsaber that changes color!


Leave a comment
This site is protected by hCaptcha and the hCaptcha Privacy Policy and Terms of Service apply.